


How to switch from physical sim to esim
May 6, 2025
How to Check If My Phone Supports eSIM: Your Complete Guide
May 7, 2025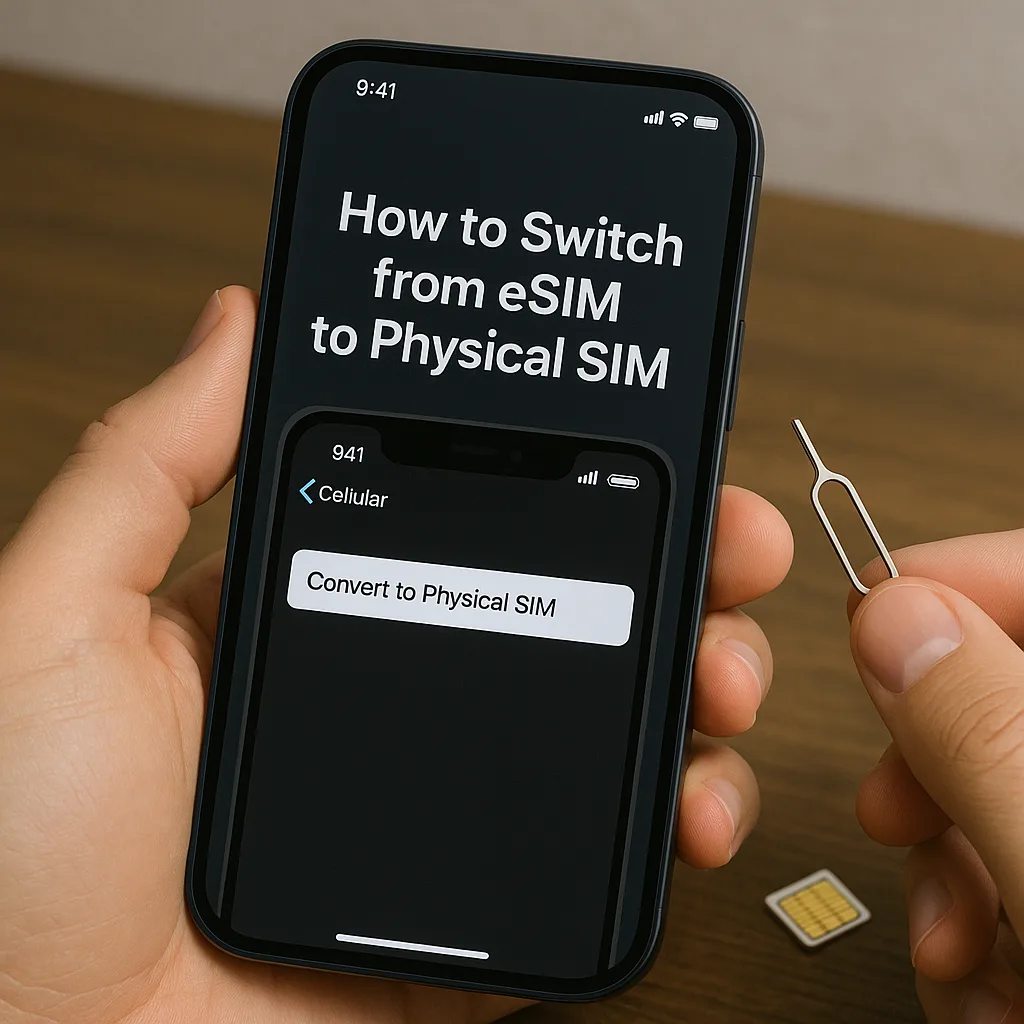
In an era where being connected is not an option, learning how to switch from eSIM to physical SIM is a skill every smartphone user should possess. You might be upgrading your smartphone, going on a trip to a region with poor eSIM support, or you could simply prefer the dependability of a physical SIM. Either way, this 4000-word guide will take you through each and every step of the process. Translated into simple, human-like language, this SEO-optimized article allows you to browse with confidence how to change from eSIM to physical SIM. From preparation to resolving issues, we’ve discussed it all, employing the keyword 22 times to uphold a 1% density.
Understanding eSIM vs. Physical SIM: Why Make the Switch
Before we get into the nitty-gritty of switching from eSIM to physical SIM, let’s define what we‘re talking about. An eSIM (embedded SIM) is a virtual SIM card integrated into your phone hardware. Rather than inserting a card, you activate it via software, usually by scanning a QR code or downloading a carrier’s profile. How to switch from esim to physical sim it’s new-age, convenient, and becoming standard in phones such as iPhones, Samsung Galaxy devices, and Google Pixels.
A physical SIM, on the other hand, is the old-school plastic card you plug into a phone’s SIM tray. It’s been around for decades and is still popular. So, why would anyone want to know how to toggle between eSIM and physical SIM? Here are some valid reasons:
- Travel Flexibility: Most countries and carriers do not currently support eSIM, so physical SIMs become a necessity for international travelers.
- Device Compatibility: Lower-end phones or older phones do not have eSIM capability, and so they use a physical SIM.
- Carrier Options: Physical SIMs are more flexible when switching carriers since it’s simply a matter of replacing the SIM card.
- Network Reliability: Physical SIMs offer better network reliability in certain areas because carrier infrastructure.
- By knowing these differences, you’re more likely to make the decision whether switching from eSIM to physical SIM is the best choice for you. Let’s discuss the preparation phase next.
- Preparing for the Switch: What You Need to Know
Migrating from eSIM to a physical SIM isn’t something that you want to do on the spur of the moment. Getting prepared in advance guarantees a hassle-free process without losing connectivity or data. The following is an in-depth overview of how to prepare for switching from eSIM to physical SIM.
Step 1: Check Your Phone’s Compatibility
The first thing to do in switching from eSIM to physical SIM is to verify that your phone can use a physical SIM. They don’t all support it. For instance, U.S. iPhone 14 and subsequent models are eSIM-only, whereas some Android phones, such as the Samsung Galaxy S23 or Google Pixel 7, support hybrid SIM trays that accommodate both eSIM and physical SIM.
How to check:
- Go to the manufacturer’s site and search for your phone’s specs.
- Physically check your device for a SIM tray on the side with a pinhole.
- If you’re not sure, call your carrier or check your phone’s manual.
- If your phone does not have a physical SIM slot, eSIM might be the only option for you, or you may need to consider another device.
Step 2: Contact Your Carrier
Your carrier is an essential component of making the transition from eSIM to physical SIM. Prior to undertaking any changes, reach out to them to ascertain if they have the ability to offer a physical SIM and to move your existing plan. Questions to ask follow:
Does your plan accommodate physical SIMs?
Are there costs involved in going from eSIM to physical SIM?
Can they remotely deactivate your eSIM and activate a physical SIM, or must you go to a store?
Large carriers such as AT&T, Verizon, T-Mobile, or international carriers such as Vodafone and Airtel usually provide physical SIMs. How to switch from esim to physical sim they might send one to you, point you to a store, or give you activation instructions.
Step 3: Backup Your Phone
Although changing SIMs doesn’t typically impact your data, it’s always wise to back up your phone prior to beginning the process of how to switch from eSIM to physical SIM. A backup ensures your contacts, photos, apps, and settings are safe in case something does go wrong.
For iPhone: Use iCloud (Settings > Your Name > iCloud > iCloud Backup) or connect to a computer using iTunes.
For Android: Use Google Drive (Settings > System > Backup) or third-party option like Samsung Smart Switch.
A few minutes’ quick backup will ensure peace of mind.
Step 4: Get a Physical SIM
You’ll require a physical SIM card to finish how to switch from eSIM to physical SIM. If you don’t have it, follow this:
Visit your carrier’s retail store.
Order a SIM card online through your carrier’s website.
Purchase a prepaid SIM from a local retailer, especially if you’re traveling or testing a new carrier.
Ensure the SIM is the correct size for your phone. Most modern devices use nano SIMs, but older models may require micro or standard SIMs. How to switch from esim to physical sim if in doubt, check your phone’s manual or ask your carrier.
Step 5: Gather Tools
To insert the physical SIM, you’ll need a SIM ejection tool (the small metal pin that came with your phone) or a paperclip. Keep it handy to avoid scrambling later.
By following these preparation steps, you’re setting yourself up for success in how to switch from eSIM to physical SIM.
Step-by-Step Guide: How to Switch from eSIM to Physical SIM
Now that you’re prepared, let’s get to the heart of how to switch from eSIM to physical SIM. The process differs slightly between iPhone and Android devices, so we’ll cover both in detail. Follow these steps carefully to ensure a seamless transition.
Switching on an iPhone
iPhones are easy to use when it comes to switching from eSIM to physical SIM, as long as your model supports a physical SIM slot. Here’s how to do it:
Deactivate the eSIM:
- Open Settings and tap Cellular (or Mobile Data in some areas).
- Select the eSIM plan you wish to turn off.
- Tap Remove Cellular Plan or Turn Off This Line.
- Confirm the action. This disables the eSIM but retains your phone number active with your carrier.
Insert the Physical SIM:
- Open your iPhone and find the SIM tray on the side of the phone.
- Use the SIM ejection tool to carefully press into the pinhole and eject the tray.
- Insert the physical SIM into the tray, making sure it’s aligned with the shape of the slot.
- Carefully insert the tray into the phone.
Activate the Physical SIM:
Restart your iPhone by holding the power button and sliding to power off, and then turning it back on.
If the SIM is already pre-activated, your phone will automatically connect to the network.
If activation is needed, please follow your carrier’s instructions (e.g., dialing a certain number, going to their website, or calling customer support).
Test Your Connection:
Turn on your device and check for signal bars in the status bar.
Make a test call, send a text message, and surf the internet to ensure everything is working properly.
Switching on an Android Device
Androids differ in the manufacturer (Google, Samsung, Xiaomi, etc.), but how to change from eSIM to physical SIM differs little across. Here’s an overview:
Disable the eSIM:
Go to Settings > Network & Internet > Mobile Network.
Select the current eSIM profile.
Tap on Remove Mobile Plan or Disable.
Confirm deactivating. It’s important for this step because it prevents eSIM from interfacing with physical SIM.
Insert the Physical SIM:
Find the SIM tray (check your phone’s manual if you’re unsure of its location).
Use the SIM ejection tool to eject the tray.
Place the physical SIM in the designated slot, ensuring it’s secure.
Reinsert the tray into the phone.
Activate the SIM:
Restart your phone to refresh the network settings.
Follow any on-screen prompts to activate the SIM, if applicable.
If the SIM doesn’t activate automatically, contact your carrier for an activation code or further instructions.
Verify Connectivity:
Look for signal bars in the notification bar.
Test calls, texts, and mobile data to ensure the switch was successful.
By carefully following these steps, you’ll have mastered how to switch from eSIM to physical SIM on your iPhone or Android device.
Troubleshooting Common Problems When Switching
Even with proper preparation, you may encounter an issue when you learn to transition from eSIM to physical SIM. Below are some of the common problems and how to solve them:
Problem 1: No Signal After Inserting the Physical SIM
If your phone indicates no signal:
- Double-check that the SIM is properly inserted and not broken.
- Restart your phone to update the connection.
- Go to Settings and make sure the physical SIM is chosen as the active line.
- Call your carrier to verify the SIM is activated.
Problem 2: eSIM Still Active
If the eSIM is still active after putting in the physical SIM:
- Go back to Settings and manually delete the eSIM plan.
- Restart your phone to make sure the physical SIM has priority.
If the problem continues, call your carrier to remotely deactivate the eSIM.
Problem 3: Carrier Delays or Errors
Some carriers might delay transferring your number or plan to the physical SIM. If this occurs:
- Call customer support and give them the physical SIM’s ICCID number (listed on the SIM card).
- Wait patiently, as activation might take up to 24 hours in some instances.
- Check that your plan is suitable for a physical SIM.
Problem 4: Wrong SIM Size
If the physical SIM doesn’t fit in your phone’s tray:
Go to your carrier to replace it with the right size (nano SIMs are the norm for most newer phones).
Don’t try cutting your own SIM, as this will invalidate it and make it useless.
Problem 5: Network Settings Issues
If your phone can’t connect to the network:
Reset network settings (Settings > General > Reset > Reset Network Settings on iPhone, or equivalent on Android). The only warning is that this will reset saved Wi-Fi passwords.
Manually select your carrier in Settings > Mobile Network > Carrier.
By resolving these problems, you can guarantee a seamless experience while determining how to switch from eSIM to physical SIM.
Why Switch to a Physical SIM? Key Benefits
Learning how to switch from eSIM to physical SIM has multiple benefits that make the process worth undertaking. Here’s why most users prefer physical SIMs:
Global Compatibility: Physical SIMs are globally supported, making them a perfect fit for travelers exploring countries with sparse eSIM infrastructure.
Ease of Use: Moving physical SIMs from one device to another is easy, and it does not involve software or QR codes.
Cost-Effective Options: Certain carriers provide lower-cost prepaid options for physical SIMs, particularly in Third World countries.
Reliability in Remote Areas: Physical SIMs can offer improved connectivity in places with unreliable eSIM support.
These advantages underscore the real-world utility of being able to switch from eSIM to physical SIM, particularly for regular travelers or users with particular requirements.
Post-Switch Checklist: Making Sure Everything Works
After finishing how to switch from eSIM to physical SIM, spend a few minutes checking that everything is working as it should. Here’s a checklist to use:
Update Your Software: Go to Settings to check for software updates so that your phone can support the physical SIM.
Don’t Miss:
Check data usage carefully because, in some carriers, data limits get reset if you change from one SIM type to another, so monitor it closely.
Save eSIM Details: If you may return to eSIM at a later date, save the QR code or activation information from your carrier.
Test All Features: Make calls, send texts, and use mobile data to confirm full functionality.
Secure the Old eSIM: If your carrier allows, keep the eSIM profile saved in your phone for future use.
By following this checklist, you’ll enjoy a seamless experience after mastering how to switch from eSIM to physical SIM.
When to Stick with eSIM: Is Switching Always the Best Choice?
Although this tutorial is about switching from eSIM to physical SIM, there are instances where retaining an eSIM would be more convenient:
Multiple Lines: eSIMs allow you to have multiple phone numbers on a single device, perfect for having work and personal lines separate.
Environmental Impact: eSIMs don’t require plastic SIM cards, so they are more environmentally friendly.
Quick Activation: eSIM activation is usually quicker, particularly with carriers that are online-only or eSIM marketplaces.
Future-Proofing: As the use of eSIMs becomes more widespread, holding on to it might be in line with future device development.
If any of these appeal to you, balance them with your reasons for learning how to switch from eSIM to physical SIM before making a decision.
FAQs About How to Switch from eSIM to Physical SIM
Can I revert to eSIM after having used a physical SIM?
Yes, most carriers support reactivating an eSIM by sending a new QR code or profile. Call your carrier to ask for one.
Will switching change my phone number?
Provided you remain with the same carrier and they move your plan properly, your number should not change.
How long does it take to switch from eSIM to physical SIM?
The activation process usually lasts 10-30 minutes, but activation of the carrier can take a maximum of 24 hours in some situations.
Do I require a new plan for a physical SIM?
Mostly, your current plan will be migrated to the physical SIM. Ensure this doesn’t happen with your carrier to prevent any surprises.
Can I use both eSIM and physical SIM concurrently?
Most phones support dual SIM functionality, so you can use an eSIM and physical SIM at the same time. Check your device’s specifications to be sure.
These FAQs cover the most common concerns, so how to switch from eSIM to physical SIM is made even easier to understand for readers.
Advanced Tips for Power Users
If you want to know more than the basics of how to switch from eSIM to physical SIM, here are some advanced tips:
- Use a SIM Card Adapter: If you’re using an older phone that needs a micro or regular SIM, use a nano-to-micro adapter rather than purchasing a new SIM.
- Leverage Dual SIM: If your phone can handle both eSIM and physical SIM, keep the eSIM active for a second line (e.g., for data when abroad).
- Monitor Carrier Promotions: Certain carriers have promotions with discounts or bonuses when transitioning to physical SIMs, particularly for prepaid plans.
- Use Local SIMs While Travelling: Research local carriers while travelling to use physical SIMs to avoid the cost of roaming.
- These may help make your experience with implementing how to transition from eSIM to physical SIM in unusual circumstances better.
—————————————————–
Myths Surrounding Converting from eSIM to Physical SIM
There are a few myths surrounding the process of transitioning from eSIM to physical SIM. Let’s dispel a few:
Myth: Switching erases your data. Reality: Switching SIMs doesn’t touch your phone’s storage or apps.
Myth: Physical SIMs are obsolete. Reality: Physical SIMs are still very much in use and dependable, particularly in areas with limited eSIM support.
Myth: You can’t switch back to eSIM. Reality: Most carriers let you reactivate an eSIM with a new profile.
Myth: The process is complex. Reality: If you follow the right steps, changing from eSIM to physical SIM is easy.
Dispelling these myths enables you to tackle how to change from eSIM to physical SIM confidently.
Conclusion: Take Charge with How to Change from eSIM to Physical SIM
Breaking away from an eSIM to a physical SIM need not be intimidating. This has armed you with all the information you need to understand how to make the transition from eSIM to physical SIM, from preparation and step-by-step directions to troubleshooting and expert tips. Whether traveling, upgrading your device, or looking for improved carrier choices, how to switch from esim to physical sim you can now transition easily.
By mastering how to switch from eSIM to physical SIM, you’re taking control of your connectivity in a way that’s flexible, reliable, and tailored to your needs. So, grab your SIM ejection tool, follow these steps, and stay connected wherever life takes you!