


Quality Control Jobs in 2025 – Best jobs to look for
July 29, 2025
How to become an eSIM reseller?
August 1, 2025
Switching to a new phone often fills us with excitement, yet the thought of transferring everything over can be daunting. As digital connectivity evolves, eSIM technology simplifies this transition, offering a sleek, digital alternative to the traditional physical SIM card. By understanding how eSIMs work, users can effortlessly move from one device to another without the hassle of physically swapping out cards.
Before diving into the transfer process, it’s crucial to become acquainted with eSIM technology and ensure compatibility with your new device. Not all gadgets support eSIM, so checking both the device and carrier compatibility is key, along with backing up your essential data to avoid any loss during the switch.
This article will guide you through a step-by-step process to transfer your eSIM from one device to another, covering both iPhones and Android devices. From deactivating the eSIM on your old phone to activating it on your new one, and even delving into specific considerations for international transfers, this comprehensive guide ensures a smooth transition, spotlighting the myriad benefits of embracing eSIM technology.
Understanding eSIM Technology
eSIM, or embedded SIM, is a digital SIM card integrated into devices, offering a seamless alternative to traditional physical SIM cards. This technology enhances flexibility by allowing users to manage multiple eSIMs and activate new cellular plans digitally without the hassle of swapping physical cards.
Transferring an eSIM is straightforward. Typically, it involves scanning a QR code or entering an activation code from your carrier. Here’s how you can do it:
- Preparation: Ensure both your current and new devices support eSIM.
- Transfer: Scan the QR code provided by your carrier or enter the activation code on the new device.
- Activation: Once transferred, the eSIM on your previous device is deactivated, ensuring exclusivity on the new device.
Device Compatibility Checklist:
- Apple: Check models like iPhone XR and iPhone 14 with iOS 16.
- Google: Ensure compatibility on models such as Pixel 3 and Pixel 6 Pro.
- Samsung: Series like the Galaxy S24 and S25 support eSIM.
With eSIM technology, switching plans and managing multiple networks on your smart device is more convenient than ever, all while reducing roaming fees and simplifying carrier activation.
Check eSIM Compatibility with New Device
To successfully transfer an eSIM, it’s essential first to confirm that both your old and new devices support eSIM technology. Most modern smartphones, including models like the iPhone XR and iPhone 14 running iOS 16 or newer, and Android devices such as the Google Pixel, Samsung Galaxy, and OnePlus, are equipped with this capability.
When considering a device upgrade, especially from older phone models, checking the device specifications for eSIM compatibility is crucial. This evaluation includes ensuring the correct operating system version is installed. For example, specific iPhones require iOS 13.1 or higher to support eSIM functionality.
Here’s a quick checklist to guide you:
- Device Models: Ensure both the current and new devices are eSIM-compatible.
- Operating System: iPhones should have iOS 13.1+; most up-to-date Android devices support eSIM.
- Carrier Support: Verify that your mobile operator supports eSIM on both devices.
Using this checklist, you can efficiently verify eSIM compatibility and ensure a smooth transition to your new smart device. Enjoy the advantages of a virtual SIM card, such as reduced roaming fees and ease of switching carriers, with confidence.
Verify Carrier Support for eSIM Transfer
Before transferring your eSIM to a new device, it’s crucial to verify carrier support for eSIM transfers. Not all carriers allow eSIM transfers between devices, so check compatibility with your provider before starting the transfer process.
Here’s how to ensure a smooth transition:
- Contact Your Carrier: Confirm that your carrier supports eSIM transfers and whether they allow the use of the same QR code or require a new activation process.
- Activation Requirements: Some carriers necessitate re-activating the eSIM on the new device. Be prepared to enter an activation code or scan a QR code, both of which may vary depending on your carrier.
- Remote Support: If you encounter issues, carriers often offer remote assistance. Reach out for help as they can provide guidance specific to your situation.
For reference, here’s a simple guide:
| Step | Action |
|---|---|
| Verify compatibility | Check with your carrier for eSIM transfer support. |
| Check activation method | Determine if you need a new QR code or activation code for the new device. |
| Contact customer support | Seek help from the carrier if problems arise during the transfer process. |
Confirming these details ensures a smooth eSIM transition to your new smart device.
Back Up Essential Data
Before transferring your eSIM, it’s crucial to back up your phone’s data to ensure nothing important is lost during the process. Use cloud services like Google Drive or iCloud to safeguard contacts, messages, and photos. Many device manufacturers also provide specialized backup solutions to help preserve essential information during an eSIM transition.
While eSIM settings and contacts are typically secure, it’s wise to back up additional data as a precaution against potential loss. Regular backups add an extra layer of security and protect against unexpected issues that might arise during the eSIM transfer process.
Here’s a quick checklist for a comprehensive backup:
- Contacts: Sync with your preferred cloud service.
- Messages: Backup through device settings or third-party apps.
- Photos: Save to a cloud service or external storage.
- Apps and Settings: Utilize device-specific backup features.
A thorough backup minimizes the risk of losing valuable information when transferring your eSIM between devices, ensuring a smooth and secure transition.
Deactivate eSIM on Old Phone
When transferring your eSIM to a new device, it’s essential to deactivate the eSIM on your old phone first, as eSIMs can only be active on one device at a time. Failing to do so may cause issues during the transfer process.
For Android Devices:
- Open the Settings App.
- Navigate to Network & Internet.
- Select eSIM.
- Find the deactivation option and proceed to deactivate the eSIM.
For iPhones:
- Go to Settings.
- Tap on Mobile Service.
- Select the eSIM plan.
- Tap on Remove Cellular Plan.
- Confirm that the notification shows No SIM to indicate deactivation.
By following these steps, you can ensure the eSIM is properly deactivated, allowing for a smooth transfer to your new smart device. Always verify deactivation to prevent any cellular plan conflicts when setting up your virtual SIM card on the new device.
Activating eSIM on New Phone
Transferring an eSIM to a new phone involves a straightforward process, but it’s crucial to ensure that the eSIM is fully deactivated on your previous device beforehand. When activating an eSIM on your new device, you have two main options: using a QR code or manually entering the eSIM details provided by your carrier. This activation can seamlessly integrate your cellular plan into your new phone, granting instant access to your data and voice services without the need for a physical SIM card. A successful activation will allow you to enjoy the convenience of managing your plan directly from your device, enabling easy switching between different carriers or plans if required.
Transferring via QR Code
The QR code method is one of the most convenient ways to transfer an eSIM to a new device. Carriers typically provide a QR code for this purpose, which you can receive via email, SMS, or through their dedicated app. To initiate the transfer, ensure your new phone is connected to the internet and scan the QR code using the device’s camera or via the settings menu. On iPhones, open the Camera app to scan the code and follow the onscreen instructions to add the cellular plan. For Android devices, access the Settings app, navigate to Connections or Network & Internet, select the SIM Manager option, and proceed to scan the QR code to activate the eSIM. This method streamlines the process, making it easy to link your eSIM to the new phone.
In cases where the QR code is not functional, or if you encounter difficulties during the transfer, you can opt for manual entry of the eSIM activation details. Additionally, if there are issues post-transfer, such as the eSIM failing to work, restarting both devices and attempting to rescan the QR code can often resolve the problem. Also, if the original QR code is no longer available or has expired, request a new one or an alternative activation code from your carrier.
Manual Activation Process
Activating an eSIM manually can be a valuable alternative when the QR code method is not feasible. Begin by ensuring the eSIM is removed from your old device before installation on the new one. Navigate to the SIM card manager in the Settings menu and choose the option to add an eSIM. Enter the activation code provided by your carrier, usually sent via email or through other communication. This method provides extra flexibility when the QR code isn’t functional.
The manual activation process requires entering specific details directly; users will need to enter this activation information accurately to ensure the eSIM is functional. Typically, following the screen prompts will guide you through the steps necessary to complete this setup, making it an intuitive process despite its manual nature. In situations where the activation doesn’t succeed, reaching out to customer support for a new activation code or assistance is advisable. Such scenarios can arise when there are network issues or other unforeseen circumstances affecting the first activation attempt.
eSIM Transfer Process for iPhones
Transferring an eSIM between iPhones has become seamless with the advent of iOS 16’s eSIM Quick Transfer feature. This innovation allows users to shift their eSIM from an old iPhone to a new one without needing to contact their carrier—a real leap forward in connectivity convenience. Here’s how you can accomplish it.
- eSIM Quick Transfer: Ensure both iPhones are running iOS 16 or later. On the new device, navigate to Settings > Cellular > Add Cellular Plan, and choose your carrier plan to start the transfer.
- QR Code Method: If preferred, users can use a QR code provided by their carrier. Simply open the Camera app, scan the code, and follow the step-by-step prompts.
- eSIM Carrier Activation: In some cases, your iPhone will notify you with “Carrier Cellular Plan Ready to Be Installed.” Follow the on-screen instructions to activate the eSIM.
- Converting Physical SIM to eSIM: On the same iPhone, go to Settings > Cellular and select the option to convert the SIM.
This process eradicates the hassles of old physical SIM cards, paving the way for a modern, efficient digital transition in cellular plans for devices like the iPhone XR, iPhone 14, and beyond.
eSIM Transfer Process for Android Devices
Transferring an eSIM from one Android device to another involves several steps that primarily depend on your carrier. Here’s a quick guide to assist you through the process:
- Contact Your Carrier: Begin by reaching out to your mobile carrier since procedures may vary. You might be required to provide essential details such as your account number, phone number, and the IMEI number of your new device.
- Verify Device Compatibility: Ensure both your old and new Android devices support eSIM functionality. Models like the Google Pixel 3, Pixel 6 Pro, and the Samsung Galaxy S24 and S25 Series are typically equipped with this feature.
- Activation Process: Depending on your carrier, you may either visit a physical store or handle the transfer online or over the phone. Activation can usually be completed by scanning a QR code or entering an activation code supplied by your carrier.
- Follow Carrier Instructions: Some carriers provide their own SIM card management apps or specific online tutorials. These resources can be invaluable for smooth activation.
By adhering to these steps, you ensure an efficient eSIM transfer without unnecessary delays or complications.
Specific Steps for Transferring from Android to iPhone
Transferring an eSIM from an Android device to an iPhone involves a few straightforward steps. Start by ensuring both your Android and iPhone are updated to the latest software versions.
Step-by-Step Guide
- Deactivate and Delete eSIM on Android:
- Open Settings, then tap on Network & Internet > Mobile network > Advanced > eSIM.
- Deactivate and delete the eSIM.
- Obtain QR Code:
- Contact your mobile operator to get the QR code for your eSIM.
- Install eSIM on iPhone:
- On your iPhone, go to Settings > Cellular.
- Select “Add Cellular Plan” and use your iPhone’s camera to scan the eSIM QR code.
- Activation:
- Follow the on-screen prompts to activate the number associated with the eSIM.
By following these steps, you’ll successfully transfer your eSIM from your Android device to your iPhone, ensuring a seamless transition without losing connectivity.
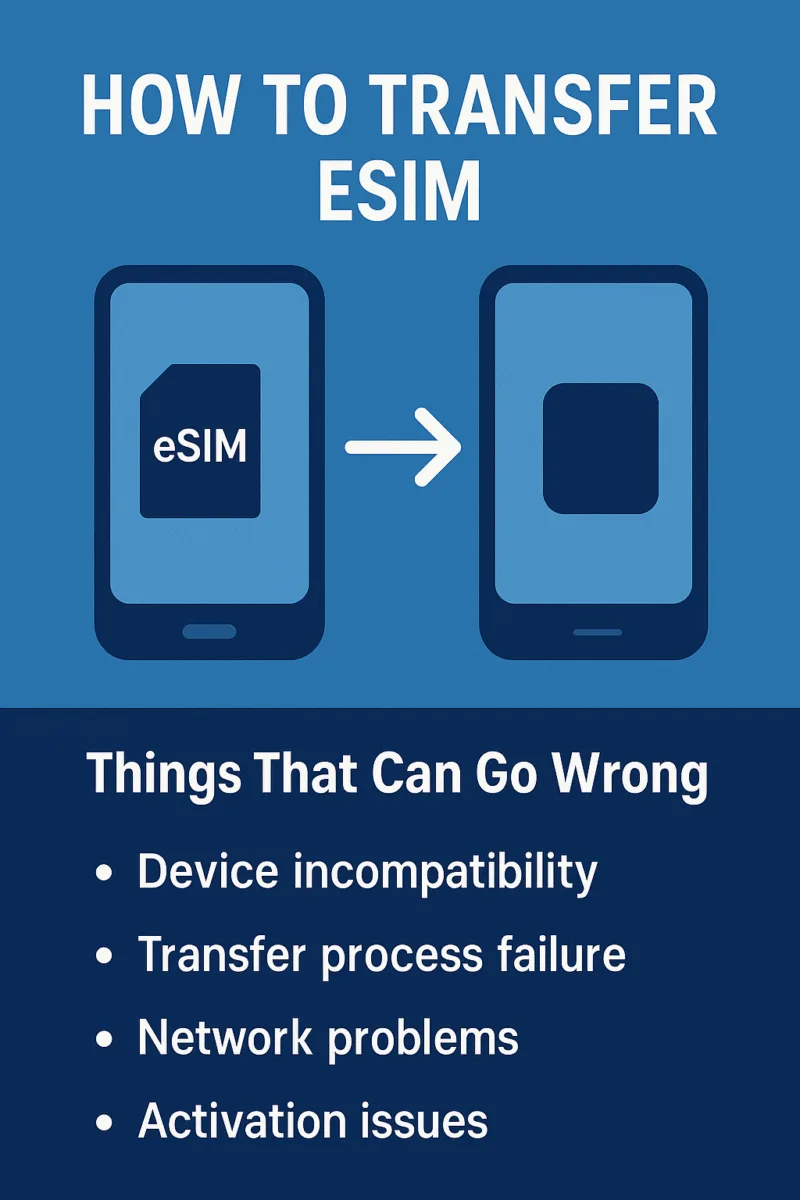
Common Troubleshooting Tips
Transferring an eSIM between devices can sometimes lead to unexpected hurdles. Here are some common troubleshooting tips to help you navigate the process smoothly:
- Restart Devices: If your eSIM isn’t functioning after a transfer, restart both phones. This simple step often resolves underlying issues.
- Rescan the QR Code: If the eSIM still doesn’t work, try rescanning the QR code provided by your carrier. This can help in re-establishing the connection.
- Cellular Setup Screen: A successful eSIM transfer should bring up a specific cellular setup screen. If this screen does not appear, additional steps may be required.
- Backup Your Data: Always use backup solutions to safeguard critical information during the eSIM transfer process to avoid data loss.
- Contact Your Carrier: When transferring an eSIM from Android or non-Apple devices like Google Pixel or Samsung Galaxy to an iPhone, or if you’re unable to set up an eSIM, it’s crucial to contact your carrier for assistance.
If challenges persist, your carrier is the best resource for additional support.
Benefits of Switching to an eSIM
Switching to an eSIM offers a variety of benefits, enhancing both flexibility and convenience for mobile users. Unlike traditional SIM cards, eSIMs allow for the activation of new cellular plans without the need for a physical card. This technology streamlines the process of switching carriers and frees up space in your device for other components.
For international travelers, eSIMs provide seamless connectivity without the burden of high roaming fees, making it easy to stay connected anywhere in the world. Additionally, eSIMs can securely manage multiple SIM profiles on a single smart device. This feature facilitates effortless switching between different mobile plans and carriers, ideal for users who frequently change mobile operator tariff plans.
Moreover, managing eSIMs digitally enhances security by reducing the risks associated with handling physical SIM cards. Users can easily switch between profiles without carrying multiple cards, offering a neat solution to maintain organized connectivity.
Benefits of eSIM:
- No Need for Physical SIM Cards
- Seamless Carrier Switching
- Space Efficiency in Devices
- Lower International Roaming Fees
- Secure Management of Multiple SIM Profiles
Overall, eSIM technology presents a forward-thinking approach to mobile connectivity, with significant advantages over traditional SIM cards.
International eSIM Transfer Considerations
Switching to an international eSIM while traveling can significantly reduce roaming costs and enhance mobile connectivity abroad. However, there are several factors to consider before relying on eSIM technology for your international communication needs. Primarily, it’s essential to understand that once an international eSIM is activated, it generally cannot be transferred to another device without acquiring a new eSIM for that specific destination. This is due to the local telecom providers’ limitations in the visiting country, which influence the eSIM carrier options available to you. Additionally, ensuring your device is unlocked is vital for seamlessly switching carriers and facilitating eSIM transfers internationally. With these considerations in mind, travelers can better manage their mobile connectivity across borders.
Potential Steps for International Transfers
When traveling internationally, utilizing an eSIM can connect you to local networks in foreign destinations, reducing the burden of high roaming fees. However, transferring an eSIM internationally might come with limitations. Should you switch phones while abroad, you may need to obtain a new eSIM compatible with your destination. Ensure your device is unlocked before departure to allow flexibility when switching carriers and manage any potential interruption in service.
Each international eSIM usually requires activation through local telecom providers, which greatly affects whether your existing eSIM can be easily transferred. Be proactive in checking with your carrier about any specific terms or limitations pertaining to international eSIM transfers. This verification will empower you to make informed decisions about maintaining continuous connectivity while avoiding unexpected charges.
Exploring International eSIM Plan Options
When planning to explore international eSIM plan options, it’s important to understand the specifics of their setup and functionality. Generally, eSIMs need to be configured in their country of origin and cannot be initially activated while roaming. This means that preparation before travel is crucial for ensuring smooth operation abroad.
eSIMs enhance convenience and connectivity, especially beneficial for travelers who use devices that support multiple SIM profiles. It’s worth noting that newer iPhone models, such as the iPhone 14, allow eSIM activation without a Wi-Fi network, which simplifies the process during international travel. However, this technology supports activation on only one device at a time, necessitating the deactivation of the eSIM on any previous device before use on a new one.
As eSIM technology becomes more widespread, it becomes increasingly important to ensure your device is compatible with this feature. Not all smartphones have eSIM support, and verifying compatibility with your intended plan country can prevent potential issues. By understanding these factors, travelers can maximize their eSIM utility while enjoying their international journeys with ease.
Final Checklist for Successful eSIM Transfer
Transferring an eSIM to a new device can be streamlined with proper preparation. Here’s a final checklist to ensure a successful transfer:
- Contact Your Carrier: Before attempting the transfer, reach out to your carrier for an eSIM carrier activation or QR code. They might offer assistance via their app, email, or in-store.
- Follow Onscreen Instructions: During the transfer, carefully adhere to any instructions provided by your device. If instructions are unclear or absent, consult your carrier.
- Secure Your eSIM QR Code: Obtain this critical code from the carrier, required for setting up the eSIM on your new device.
- Test the Connection: Once the transfer is complete, make a call or browse the internet to confirm functionality.
- Store eSIM Details Safely: Ensure your eSIM information is securely stored, as it will be necessary for any future transfers or travel.
Quick Reference Table
| Task | Action Required |
|---|---|
| Carrier Contact | Request QR code or activation support |
| Device Instructions | Follow on-screen guidance |
| Connection Test | Check call/internet functionality |
| Secure Storage | Keep eSIM details safe for future use |
By following this checklist, you can ensure a hassle-free eSIM transfer to enjoy uninterrupted connectivity.